
Guest blog by Jake Reynolds Production
There are plenty of articles and videos that cover the beginnings of music production, and many of these cover the basics when it comes to building a home studio. The majority of these look at home studio construction from a composer or producer perspective, and in order to provide something a little different this article will look at building a home studio from an engineering point of view. While there is going to be a lot of commonality between the two, and getting bogged down in technical specs is inevitable, I will try to focus on the components of a studio built for engineering music and also avoid endless lists of gear where possible.
Why build a home studio for engineering?
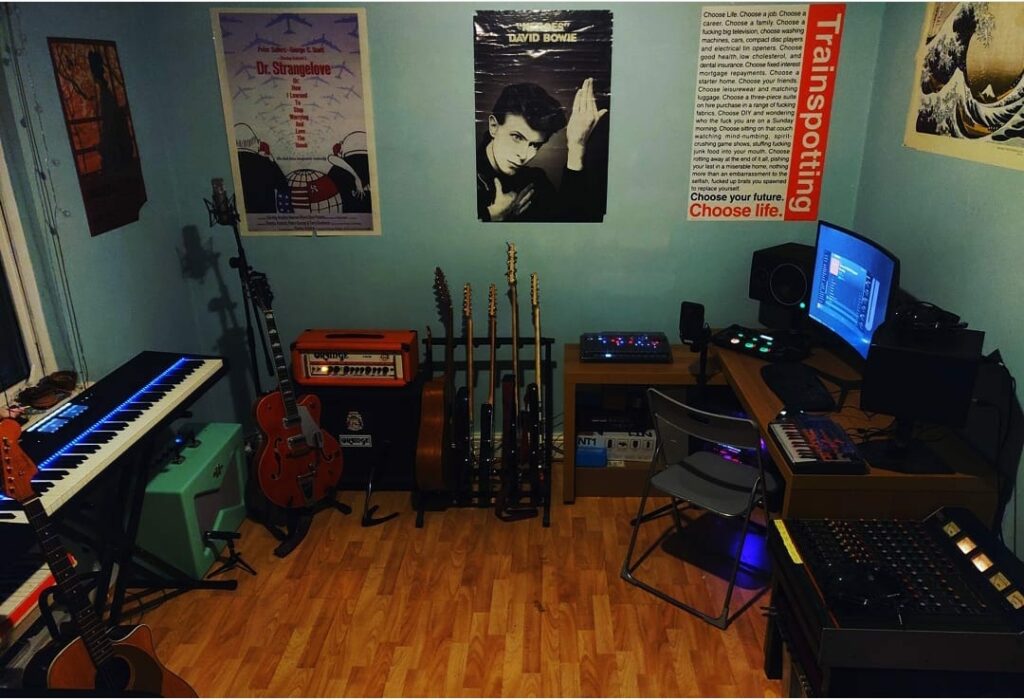
While being able to write and record your own material at home feels like an obvious solution for songwriters and composers, the idea of trying to compete with purpose built studio space for mixing and mastering engineers is a little more daunting. Given the commercial studios that I’ve worked in have spent thousands of pounds on acoustic treatment and soundproofing well before a single bit of hardware has been purchased, the suggestion that you can make critical audio engineering decisions from a bedroom feels a little off. However, once you are familiar with your craft, your system, and your space (all points we will touch upon later), you will be surprised at how much you can do in a properly constructed home studio.
Space
The environment you work in is arguably the most pivotal factor when it comes to audio engineering, given it will have the highest impact on your playback system. There are a number of complex factors that I can’t do justice in this space, so I will provide some additional resources below. Instead, I’ll tackle three key components in brief.
Firstly, the size and shape of your room should be addressed. Thankfully the majority of rooms in residential houses are some form of rectangle, as spaces with odd features or angles can cause odd acoustic reflections. Unfortunately these rooms tend to max out at 5 meters in their longest dimension. The reason this can become an issue is due to the wavelength of low frequencies being larger than the room itself (20Hz is around 17m).
Given that wavelength is one of the key culprits for a bad room, speaker placement is the next key issue. A rectangular environment is ideal as it allows you to place your speakers on a longer axis, and compensate for reflections. When placing speakers, they should be at least 50cm away from the wall to prevent bass frequencies suffering from bad early reflections. From a listening perspective the rule of thumb is to place them in an equilateral triangle, with an equal distance between each speaker and the listening position. Again, here you want to maximise distance between yourself and the speakers, ideally in the region of 2m, but given we tend to be working with smaller spaces at home just give yourself as much space as possible.
Lastly, acoustic treatment is incredibly important in compensating for less than ideal spaces. There exists a whole world of panelling, diffusion, clouds, traps and foam to think about, far too much for this article. However, I will note that one of the most common and cost effective solutions is to build your own acoustic absorption panels using rockwool. Also, given that low frequencies tend to cause us the most problems, making use of bass traps is vital in preventing resonances and low end build up in the corners of rooms.
It will be nigh on impossible to get your home to sound like a purpose built studio, but if you address these three aspects you should find yourself pretty close. What I can recommend is using some sort of speaker calibration software like Sonarworks Reference, which uses a microphone to listen to how your room responds to certain frequencies and then applies an EQ curve to your monitors to compensate for acoustic problems. This in combination with a well prepared space will put you in good stead to start engineering some music.
Ecosystem
When discussing what sort of software you might be using, the go-to conclusion for composers is that any computer and any DAW will suffice and to choose the one you enjoy using. While I don’t disagree with this, for engineering there are some other aspects to consider. When I say ecosystem, I mean the compatibility and functionality of hardware and software.
Your studio ecosystem begins with your computer, and your capacity to work with various bits of software and hardware flows out from this. The Mac/PC debate is one of the most antagonistic discussions you can have with another engineer, and both do offer distinct benefits. Most of us will be aware of the proprietary software Logic Pro, available only on Apple computers, and you might also be familiar with the frustrations of trying to integrate new components with a Mac when compared to a PC. Commercial studios tend to use Macs due to their stability, as having your session crash mid-recording could be costly.
Next comes your DAW, which will be the deciding factor in which pieces of hardware you can integrate into your setup. As a Pro Tools user, I have become acutely aware of how many devices are incompatible with my setup, often due to working over different protocols. As such, it is worth investigating what additional equipment you may want to use in the future when deciding on your DAW. Though I must stress that this shouldn’t be a deciding factor, your comfortability with the software and it’s popularity amongst the people you work with are key. As more and more songwriters begin to record and mix from home, the capacity to share project files is incredibly useful.
Conversion
Conversion is one of the most hotly debated topics in audio engineering, with acclaimed artists like Neil Young suggesting that any AD/DA in the chain adds unwanted distortion, and other engineers suggesting that the quality of modern day converters makes paying a premium useless. In my experience, the answer lies somewhere in between (controversial I know).
Converter quality tends to affect three things in an audio signal: the depth of the low-end frequencies, the clarity of high-frequencies, and the quality of the stereo image. Each time audio passes through an AD/DA stage you lose some low-end frequency information, although a near negligible amount continuous passes through various pieces of hardware may begin to result in an audible difference. On the other hand, given the way that higher frequencies behave, cheaper converters tend to struggle to process this cleanly, which results in crunchy or harsh results. Lastly, the stereo image is affected by the quality of the converter clock, a device which is used to ensure each channel of audio is synchronised as closely as possible. When something deviates too much (even by a matter of samples) it can cause phase issues, which result in a more occluded stereo image.
Once you have considered these factors, you also need to break down what you need from your converter in terms of work flow. If you would like to interface a mixing desk and various outboard units, then a relatively high number of inputs and outputs will be needed, whereas if you intend to work exclusively in the box you may only need 2 channels for monitoring. Furthermore, the issues that arise with low-quality converters may be of less concern if you aren’t planning to repeatedly pass audio in and out of hardware processors.
Lastly, you should think about what sort of protocol you would like your converter to operate over. Whether its USB, Thunderbolt, Firewire or PCIe, these will affect your hardware and software considerations from earlier.
While I am trying to steer clear of listing bits of kit, I will provide some of the better converters in each price point down below.
Hardware
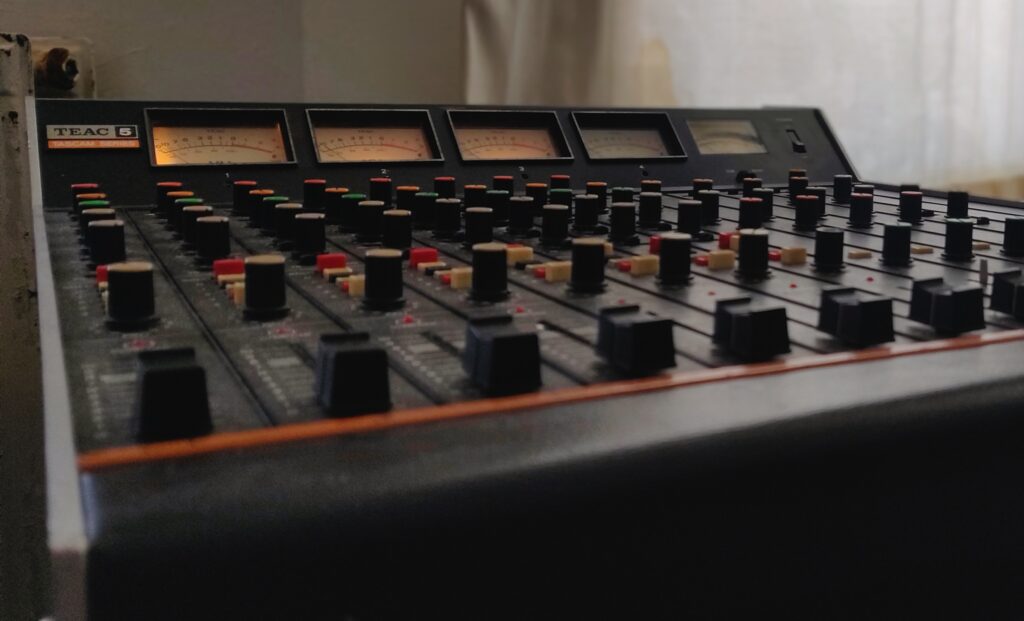
In my experience hardware is by far the most fun aspect of building any studio, and when investigating hardware from an engineering perspective there are numerous variables and potential combinations to think about.
Control surfaces are a very exciting way to emulate the feeling of working on a large format analogue mixing console, and many engineers (myself included) enjoy the tactile element of using banks of faders and switches. This is especially useful when it comes to writing automation, as riding a fader is by far the most musical way to make volume dynamic changes to a song.
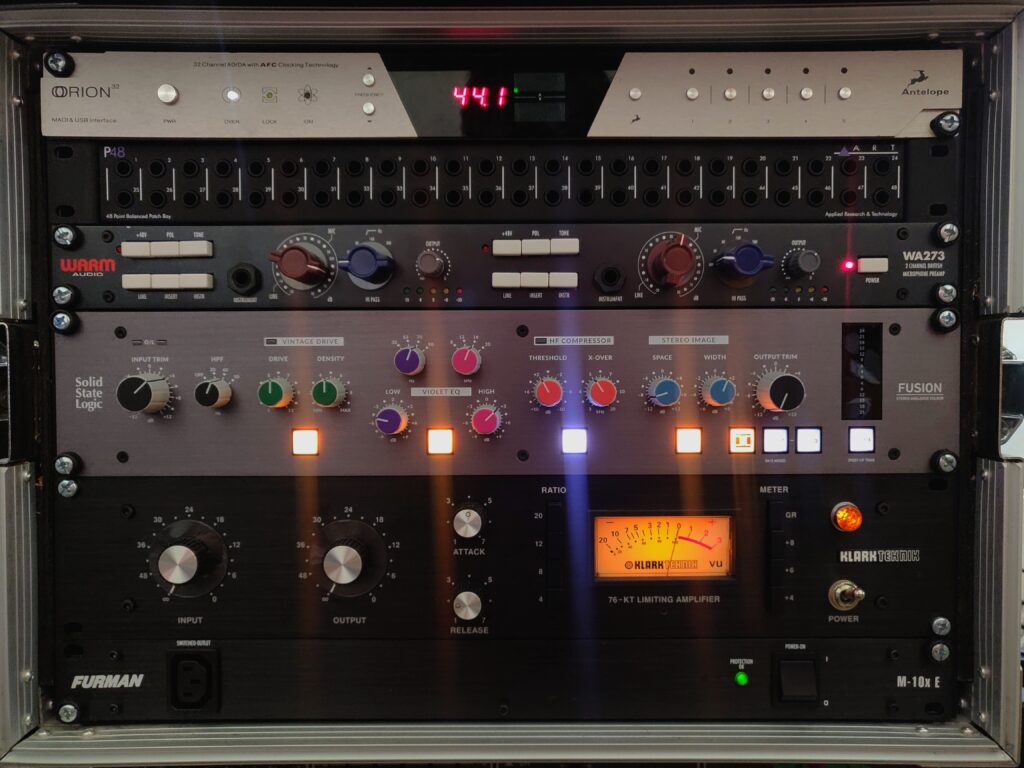
Outboard equipment is often very appealing to use, and there is a world of equipment to become lost in EQ, Compression, and FX. My approach to investing in hardware processors is in keeping with how most would approach mixing and production: EQ & Compression will get you 90% of the way there. As a result, I have limited myself to a select few compression and EQ units in my home studio.
Plugins
My approach to hardware processing and plugin processing is very similar, keep your options to a minimum and select a few high quality products to do the majority of your work. Firstly, by investing in fewer plugins you will be able to afford ones of a higher quality, as there is a mystifying number of poorly constructed bits of software. The better brands such as Universal Audio, Softube, SSL and Fabfilter price their products accordingly, but their quality and flexibility far outweigh having a number of cheaper plugins at your disposal. Returning to the idea of an ecosystem, plugin choice will also affect elements of your hardware as brands such as Universal Audio and Antelope use DSP processing which requires one of their interfaces or an external processor.
Following this, a basic understanding of how plugins operate behind the scenes is useful. The software versus hardware debate is yet another hard-fought spot in the audio engineering community, but understanding how oversampling and gain-staging affect aliasing tends to negate a lot of the complaints people have with plugins.
In summary
In summary, once you have dealt with the room, acoustics, and monitoring, your biggest consideration should be how you need your studio to work for you, and build an ecosystem that supports that. I have provided a number of resources that cover the more complex aspects of acoustics, conversion and plugins below so that you can get your studio working as well as possible, and a short list of the converters I have found to be worth investing in.
Resources
Acoustics

Conversion

Plugins & Aliasing


Converters
SSL 2 – £169.00
Focusrite Clarett 4Pre – £419.00
UA Apollo Twin – £869.00
RME Fireface UCX – £930.00
Ferrofish Pulse 16 – £819.00
Antelope Orion 32+ – £2200.00